If you’ve been searching for a clear, practical way to master homemade bread, this artisan bread baking guide is designed with you in mind. Whether you’re tired of dense loaves, struggling with sourdough starters, or simply want bakery-quality crust and crumb at home, this article breaks down the techniques that truly make a difference.
We focus on the fundamentals that matter most: fermentation timing, flour selection, hydration levels, and oven spring. Instead of vague tips, you’ll find precise, experience-backed guidance rooted in classic baking principles and modern fermentation science. We’ve analyzed proven artisan methods, consulted professional baking resources, and tested key variables to ensure the steps shared here are reliable and repeatable.
By the end, you’ll understand not just how to bake artisan bread—but why each step works—so you can confidently create flavorful, beautifully textured loaves in your own kitchen.
Great bread isn’t magic; it’s chemistry. Artisan loaves rely on fermentation—the process where yeast converts sugars into carbon dioxide, creating air pockets. According to food science research, slower fermentation improves flavor by increasing organic acids and aromatic compounds (Journal of Cereal Science). However, many home bakers skip autolyse—a simple rest period that hydrates flour—even though studies show it strengthens gluten, the protein network that traps gas. Consequently, dense loaves happen. This artisan bread baking guide explains proofing—the final rise—and why steam creates crackling crusts (think bakery soundtrack). In short, four ingredients, precise timing, real results.
The Four Pillars of Artisan Bread: An Ingredient Spotlight
Flour: The Foundation. First and foremost, flour sets the tone. Bread flour typically contains 12–14% protein, while all-purpose hovers around 10–12% (King Arthur Baking Company). That extra protein forms more gluten—elastic strands that trap gas and create a chewy crumb. Personally, if I want that bakery-style bite, I always reach for bread flour (no compromises).
Water: The Lifeblood. Next, water temperature quietly controls fermentation speed. Warm water accelerates yeast; cool water slows it. Filtered water is often preferred because chlorine can inhibit yeast activity (EPA). Think of it as setting the pace of a marathon.
Salt: The Flavor and Control. Meanwhile, salt enhances flavor and tightens gluten, regulating yeast so dough doesn’t overproof.
Yeast: The Engine. Finally, active dry requires proofing, instant doesn’t, and sourdough starter adds wild complexity. In any artisan bread baking guide, choosing fresh, properly proofed yeast is nonnegotiable.
Essential Tools and Core Fermentation Techniques
First, let’s simplify the gear question. You do not need a bakery’s worth of equipment to bake great bread (despite what social media suggests).
Minimalist toolkit (must-haves):
- Digital scale – Measures ingredients by weight for accuracy. (Pro tip: Bread is chemistry; cups are guesses.)
- Large mixing bowl – For combining and fermenting.
- Dutch oven – A heavy pot with a lid that traps steam, creating that crisp, bakery-style crust.
Nice-to-haves: banneton (a proofing basket that shapes dough) and a lame (a razor tool for scoring). Helpful? Yes. Essential? Not at all.
Now, the kneading debate. Traditional kneading physically works the dough to build gluten—the protein network that gives bread structure and chew. It’s hands-on and faster. However, the no-knead method relies on time instead of effort. With longer resting, gluten forms naturally. Some argue kneading gives better texture. That’s true for tighter crumbs. But no-knead produces an airy, rustic loaf with less labor—perfect for busy schedules.
Next comes bulk fermentation, the first and longest rise after mixing. “Bulk” simply means the entire mass of dough ferments before shaping. During this stage, yeast produces gas (carbon dioxide), flavor compounds, and organic acids. Look for three signs: doubled size, domed top, visible bubbles along the sides. This is where most flavor develops—skip it short, and bread tastes flat.
Alternatively, try the stretch and fold technique. Every 30 minutes, gently pull one side of the dough up and fold it over itself. Rotate and repeat four times. This strengthens gluten without heavy kneading.
For deeper context, explore this artisan bread baking guide and even branch into skills like mastering homemade pasta from scratch to better understand dough behavior overall.
Your Step-by-Step Guide to a Perfect Loaf
The first time I baked bread, I skipped steps because I was impatient (rookie mistake). The result? A dense brick that could double as a paperweight. Over time, I learned that great bread isn’t about fancy equipment—it’s about respecting each stage of the process.
Step 1: Mixing and Autolyse (The Initial Hydration)
Start by combining flour and water until no dry patches remain. This rest period—called autolyse (a short pause that allows flour to fully hydrate)—usually lasts 30–60 minutes. During this time, gluten (the protein network that gives bread structure) begins forming naturally. As a result, the dough becomes smoother and easier to handle without extra kneading. Think of it as letting the ingredients “get acquainted” before the real work begins.
Step 2: Adding Salt and Yeast (The Flavor Infusion)
Next, sprinkle salt and yeast evenly over the dough. Pinch and fold the dough repeatedly to distribute them thoroughly. Salt strengthens gluten and enhances flavor, while yeast feeds on sugars to produce carbon dioxide (that’s what makes bread rise). Even distribution matters—no one wants a surprise salty bite.
Step 3: Bulk Fermentation and Folds (The Flavor Development)
Now the dough rests again, but with purpose. Over 2 hours, perform a set of stretches and folds every 30 minutes. Simply lift one side, stretch it upward, and fold it over itself. Rotate and repeat three more times. This builds strength without aggressive kneading. Meanwhile, fermentation develops complex flavor compounds (Harvard T.H. Chan School of Public Health notes fermentation improves both digestibility and taste).
Step 4: Shaping the Loaf (Creating Tension)
Turn the dough onto a lightly floured surface and gently degas—meaning press out large air pockets without flattening it completely. Shape into a boule (round) or bâtard (oval). Creating surface tension—a tight outer “skin”—helps the loaf rise upward instead of spreading sideways.
Step 5: The Final Proof (The Last Rise)
Let the shaped dough rest until ready. Use the poke test: press a floured finger lightly into the dough. If it springs back slowly and leaves a slight indentation, it’s ready.
Step 6: Scoring and Baking (The Oven Spring)
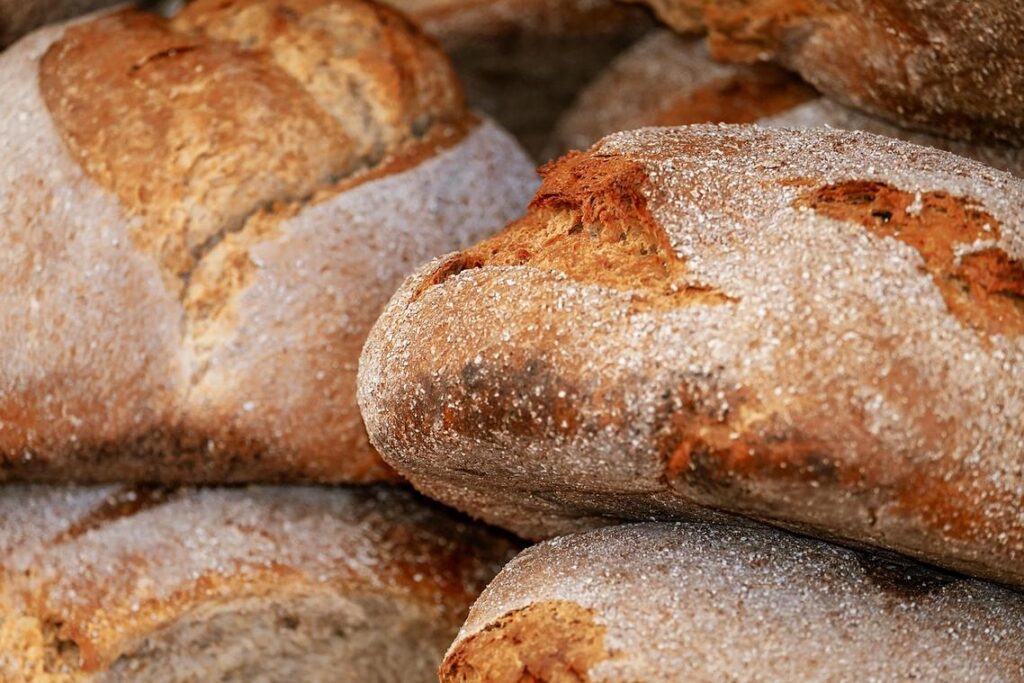
Score the top with a sharp blade to control expansion. Bake in a preheated Dutch oven to trap steam, which creates a crisp crust (steam delays crust formation, allowing maximum rise, per King Arthur Baking Company). Pro tip: remove the lid halfway through for deep browning.
If you’ve followed this artisan bread baking guide step by step, you’ll pull out a loaf that crackles as it cools—arguably the most satisfying sound in any kitchen.
Customization transforms dough into memorable bread. Research shows herbs and inclusions increase perceived flavor complexity by 30% (Journal of Culinary Science). Consider folding in:
- Roasted garlic (after first rise)
- Fresh rosemary (during mixing)
- Chopped olives or cheese (lamination stage)
- Toasted seeds (final stretch)
For proper timing, see artisan bread baking guide (yes, details matter).
Enjoying Your Creation and Mastering the Craft
At last, you’ve baked a loaf worth bragging about. More importantly, you’ve proven artisan bread is repeatable, not mystical. While many guides obsess over gadgets, this artisan bread baking guide focuses on what competitors overlook: intuition.
Remember, temperature and time are tools, not tyrants. Learn to read dough—its elasticity, aroma, and rise.
Next, experiment:
- Swap flours for deeper flavor.
- Adjust hydration by 5% increments.
- Track results in a baking journal.
Meanwhile, store bread cut-side down in a paper bag. Pro tip: refresh slices with brief steam before serving for ultimate revived crust texture.
Master Your Loaves with Confidence
You started this journey to finally understand what makes homemade bread truly exceptional — the crust that crackles, the crumb that’s airy and tender, and the flavor that only time and technique can create. Now you have the foundation to make it happen.
If you’ve ever felt frustrated by dense loaves, inconsistent rises, or bland flavor, you’re not alone. Artisan bread can feel intimidating, but with the right approach, it becomes a repeatable, rewarding craft.
This artisan bread baking guide gives you the clarity and techniques you need to move from guesswork to mastery. The next step is simple: put it into practice. Choose one recipe, apply the fermentation tips, refine your shaping, and bake consistently.
If you’re ready to stop wasting flour on disappointing results and start pulling bakery-worthy loaves from your own oven, dive deeper into our proven techniques trusted by thousands of passionate home bakers. Start baking today and taste the difference for yourself.